Illustrator Tutorial: Neon Tube Light Mudflap Girl
Neon is a great way to draw attention to something, and that is why you see it everywhere in places like Las Vegas were everyone is trying to grab your attention and get you into their casino or club. The same principle can work for you in your prints and digital designs.
There are a number of good tutorials on creating neon effects in Photoshop, the best at the time of writing is Alex Beltechi’s on PSD Tuts+. If you are creating your documents with Illustrator then we can use some similar techniques to the Photoshop tutorials but apply then to Illustrator, this is what this tutorial attempts to do.

This is the final image we will be creating. Click on the image to open it full size in a new window.
Download Source Zip File (435,000 bytes)
Download the source files and open with Adobe Illustrator. Files are saved as legacy format and will work in all versions of Adobe Illustrator CS.
1. Neon works best against a dark background. Create a black background for this example by drawing a rectangle with the Fill set to Black. Using the Pen tool create a simple outline shape. For this example we are using the silhouette of the ‘mudflap girl’. Use a Stroke colour that stands out from the background for now, and set the Fill to None.
Tip: If you are not so confident creating succinct shapes with the Pen tool, draw your shape with the Pencil tool. Then select the new shape with the Selection tool (). Go to Object>Path>Simplify. In the Simplify menu, click the Preview option, then experiment with the Curve Precision percentage till your shape becomes smooth like neon tubing.
2. Select the layer in your Layers palette that contains your shape, and then click on the options in the upper right hand corner (). In the menu that opens, select the Duplicate option. Repeat this step once more, so you end up with three separate layers with your shape on each one. You may find it easier to rename the layers at this point, in this example the layers are named 1,2 and 3.

Your shapes path selected with a 15pt. Stroke in White.
3. Toggle off the visibility for Layers 2 and 3 by clicking on the eye icon in front of them in the Layers palette (). Select the shape on layer 1 (using the Selection Tool ), and change the stroke colour to a deep and saturated hue. In this example we use a dark pink. Then increase the stroke’s width to 15 points with the Stroke palette (Window>Stroke).
Tip: If your shape has ends and does not link up at each end you can use a brush to create the round edge to your path. In this example we use three brushes 15pt. Round, 12pt. Round and 5pt. Round you may have to create brushes for the size you require if they are not in your default brush panel.
4. Select your shape, and then go to Effect>Blur>Gaussian Blur. In the Gaussian Blur dialog, set the Radius to 2.0 and click OK. This will provide the glow for your neon shape.
5. Toggle on the visibility of Layer 2 now. Select the shape on this layer, then change its stroke width to 12 points and the colour to a lighter version of the one you selected in Step 3.
6. Now toggle on the visibility of Layer 3. Change its stroke width to 5 point and the colour to an even lighter version of the one you selected in Step 3.
7. Lastly we want to try and add some realism. When making a neon sign tight curves tend to overlap so some parts are behind others, to create this effect all we do is remove some portions of Layer 3 that removes the highlight from the tube and makes it seem like it is further behind the rest of the neon tubing. Using the Direct Selection Tool () click an anchor point and hit the delete key, a portion of the stroke should be removed. You will have to experiment with your own image to see were parts need to be removed to create the desired look.
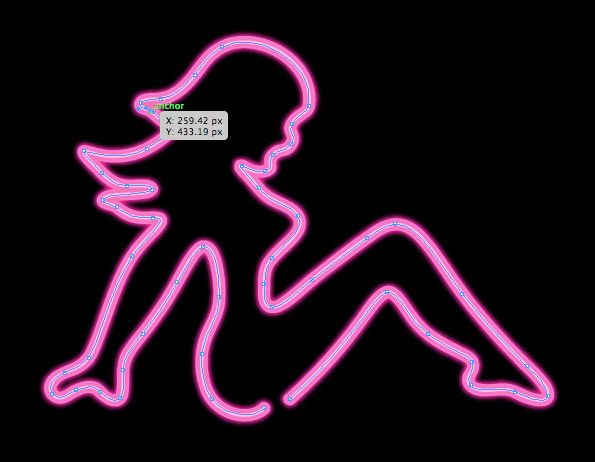
Use the Direct Selection Tool to delete the anchors for areas in shadow.
You are free to use this technique or the above images freely in your personal or commercial projects all I ask is you leave a comment to say thank you.
This article was posted on 07 August 2009 in Freebies, Illustrator, Tutorials
What you have had to say about all this...
You cannot believe how long i've been looking for something like this. Browsed through 5 pages of Yahoo results couldn't find diddly squat. Very first page on Bing. There was this…. Gotta start using that more often Thank you.
- Victor GeitgeyThat's the end of this article. I hope you found it useful. If you're enjoyed this article why don't you have a look around the archives, where you can find some more tutorials, tips and general ramblings.
comments